Advice Centre
How to Install Car Dog Guards Effectively
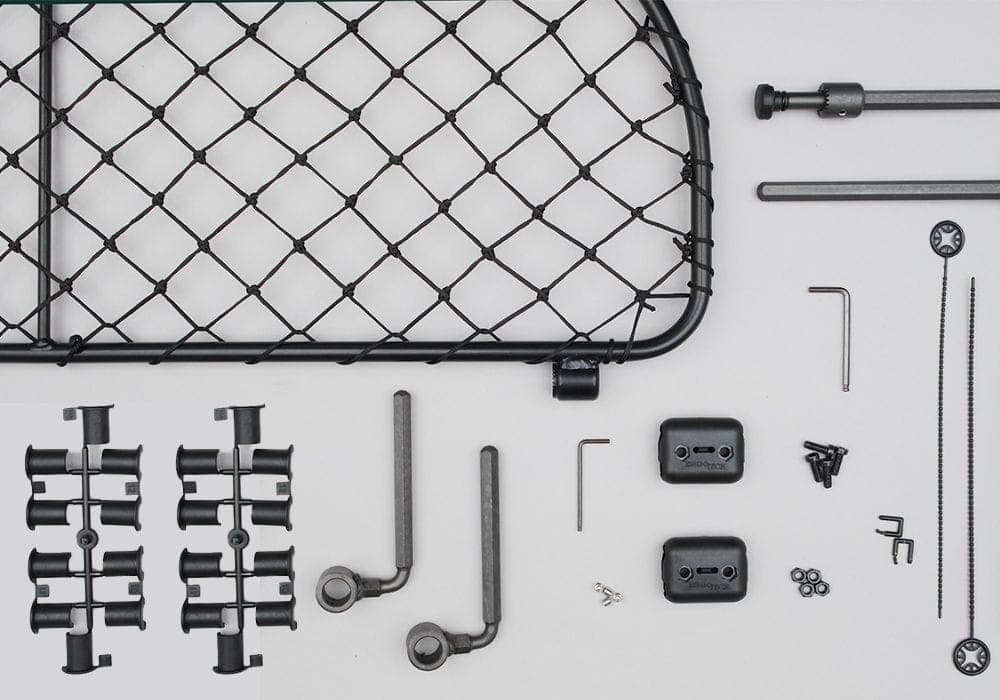
Having difficulty installing an ErgoTech Car Dog Guard? We've put together a visual step-by-step guide to help you out. We recommend familiarising yourself with all the parts and to check you have all the components you need before beginning the installation. Our dog guards attach to the headrests of the rear seats of each vehicle they are tailored to, no drilling is required and the frame slots onto bars that wrap around the headrest legs. A tilting mechanism allows for positioning the frame in the most optimum position to ensure your pooch doesn't go clambering through the car interior and interrupting drivers and passengers.

Step 1
Remove backseat headrests completely from their sockets (Can't remove headrests? No problem, you'll need one of these >>). Be sure to confirm all the parts of the dog guard are in your possession before disposing of any packaging and plastics. The bushing and hairpin elements can sometime be mistaken for unwanted materials but are essential to fitting your dog guard in place later in this installation guide.
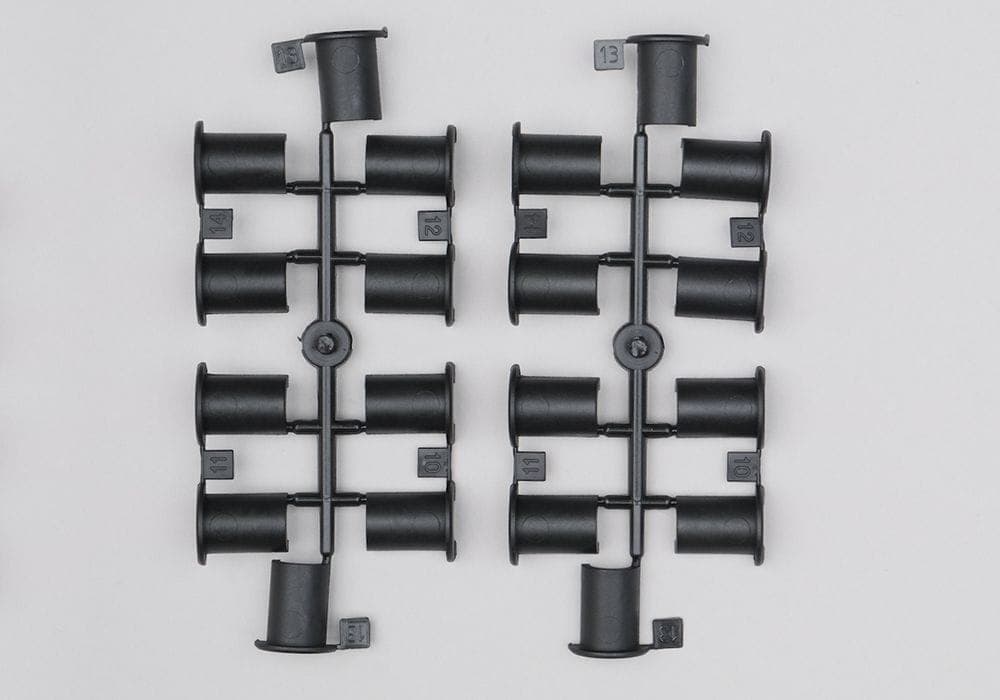
Step 2
Find the right size bushing that wraps around the headrest bars by trialling the different sizes available in your dog guard kit. You can fix these into place by squeezing the two bushing halves together at the top of your headrest bars leaving roughly a 1cm gap. The two bushing parts need to sit on the headrest bars closest to the windows of the car, leaving the middle two headrest bars clear of any attachments.
Step 3
Take both brackets (x2) and feed the round part over the top of the bushing that’s currently gripped to the headrest bars. Ensure the longer bracket sides pointing horizontally towards the centre of the car. Tighten them fully into place using the smallest Allen key provided.
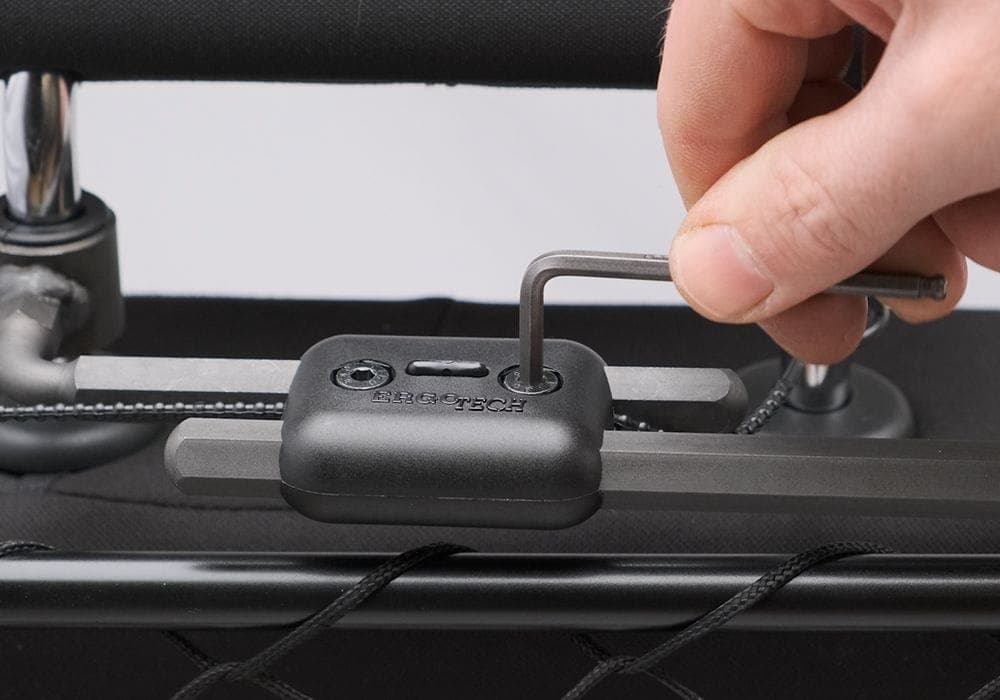
Step 4
The rectangular clamp allows for the positioning of the dog guard frame, the two provided need to slide across the longer brackets to roughly the middle of each headrest. Be sure to slide this through on the top of the clamp with the second clamp hole left free pointing towards the boot of the vehicle. Using the four nuts & bolts provided, screw them into place but keep them loose to allow for the manoeuvring of the dog guard before tightening them to fit a bit later.
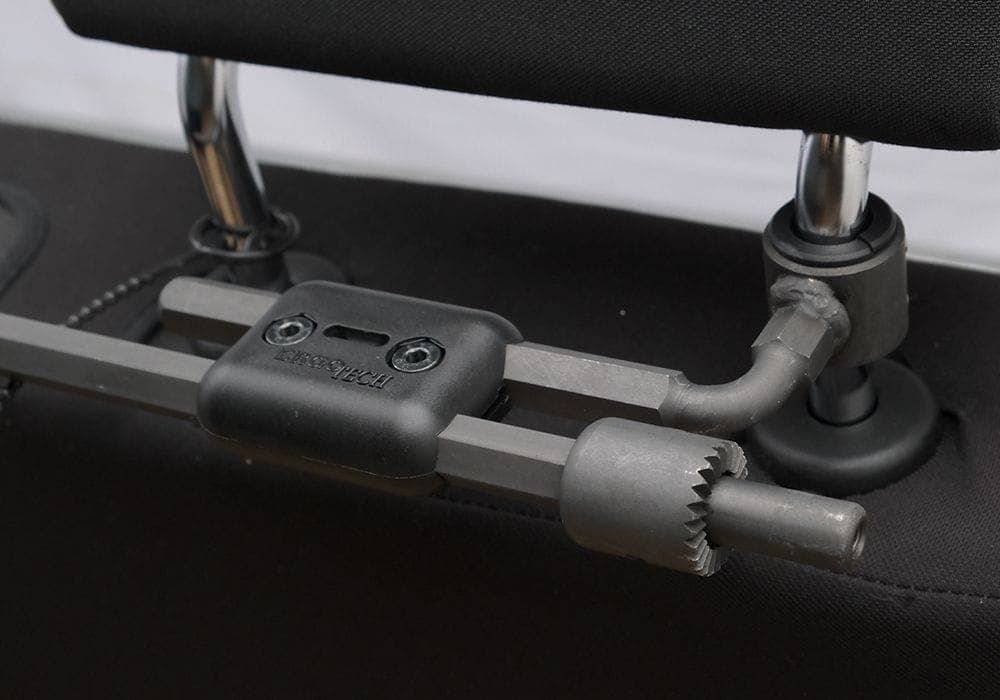
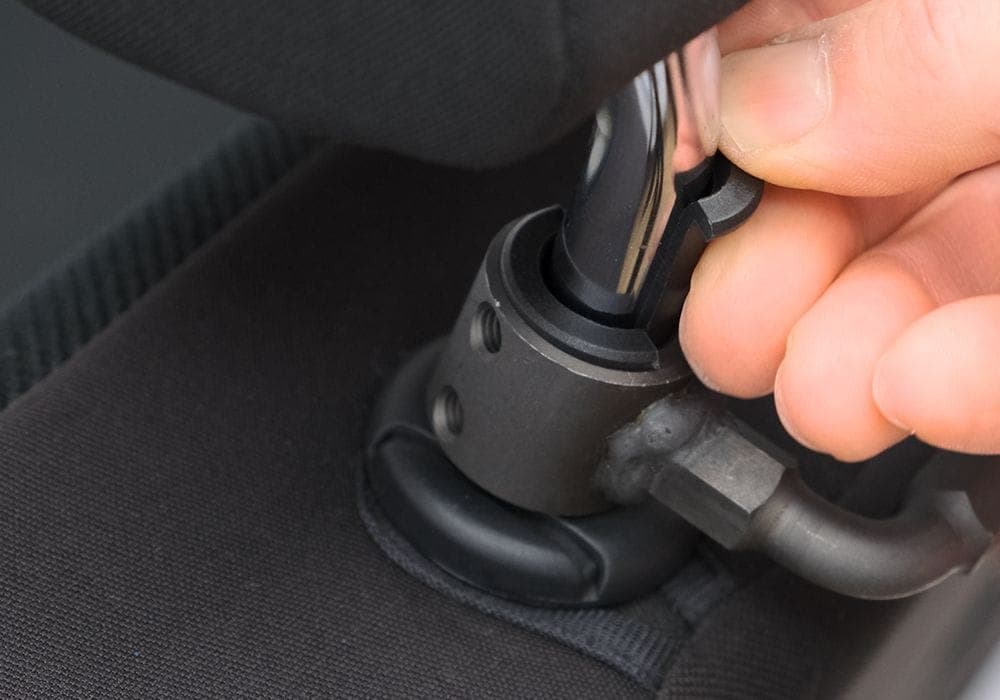
Step 5
The two hexagonal bars need to be slid into the second hole of the clamps provided, with the thicker end pointing to the centre of the backseats.
Step 6
The main dog barrier is now ready to be attached to the hexagonal bars, ensure you align the fixtures at the base of the frame to the thicker ends of the hexagonal bars. Secure in place using the two knobs provided. Do not be alarmed if the dog guard doesn’t stand upright at this point, it will more than likely fall backwards by up to 180 degrees and you can gently allow this to happen.
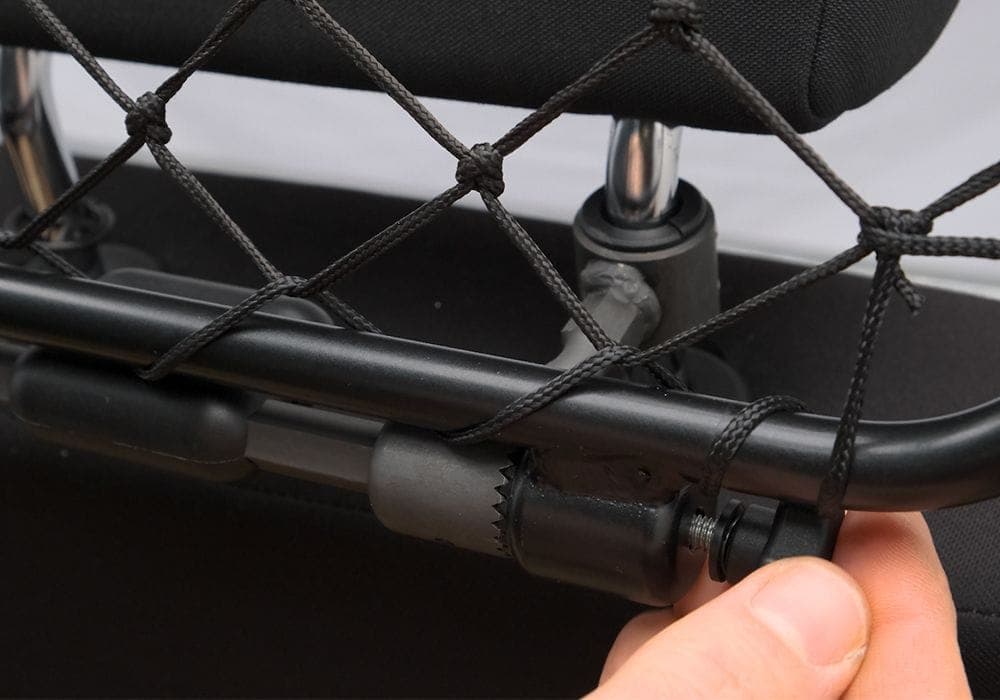
Step 7
You can move the clamps around to ensure they are sat right in the middle of the headrests. Once complete thread the thin safety strap through the middle of the clamps and pop the hairpin through the middle of two holes on the main face of the clamp.
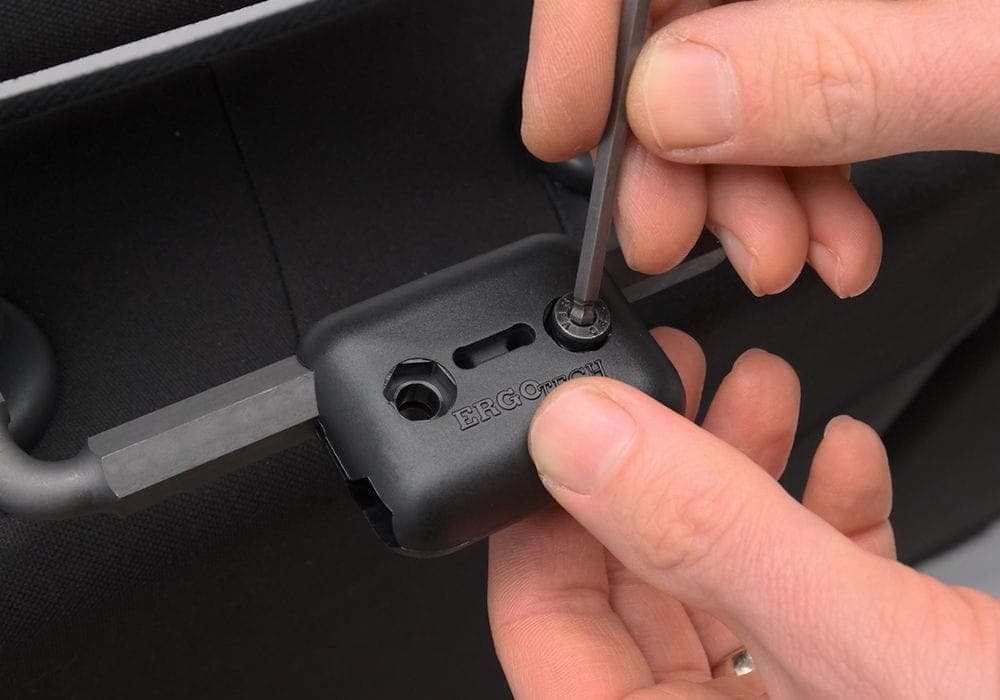
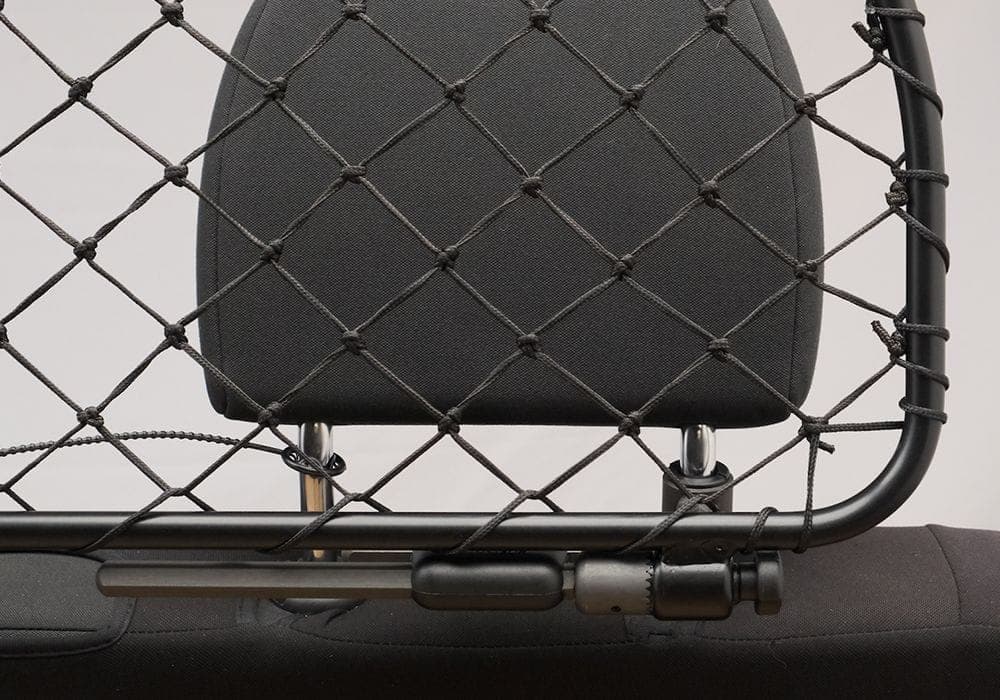
Step 8
Make sure the dog guard is back in an upright vertical position and using the larger Allen key tighten the nuts and bolts that were left loose earlier to ensure the guard stands strongly without falling backwards.
Additional Support Installing Car Dog Guards
If you're still having difficulties then drop one of our experts a message via [email protected] and we'll be able to assist you through the process. Or check out our YouTube dog guard installation video and see how to piece it together in real-time.
If you have a vehicle where the headrests can't be removed then we also sell an additional kit that enables you to overcome that hurdle. Follow this link for more details on the ErgoTech Easy-Fit Headrest Kit.
And don't forget if you have multiple vehicles or have recently changed cars then you can browse our entire collection of custom-fit dog guards online. Simply use the website filters to find one that fits your make and model or enter your vehicle registration in the yellow box to display all products that are tailored to fit your vehicle perfectly.

